Neotech WordPress Documentation
Thank you for purchasing our template. If you have any questions regarding our product feel free to visit our support forum
Getting Started
Unzip files from archive and you will find following folders and files.
- includes/demo-import - folder with data import files
- neotech-child.zip - archive with child theme
- neotech-theme.zip - archive with installable WordPress theme
Theme Installation and Demo Import Video Tutorial
Recommended Plugins
After theme installation you'll see a notification with recommended plugins that you should install if you want to get full functionality of a theme. The most important plugins are highlighted with Required label.
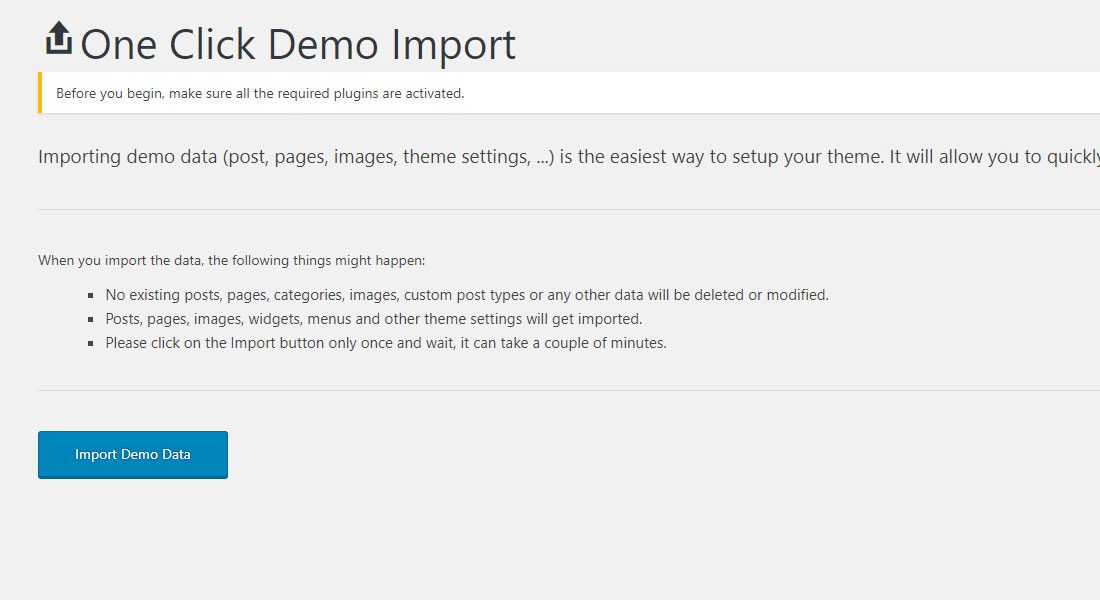
Demo Import
Go to Appearance -> Import Demo Data. Click Import Demo Data Button and wait until the process is finished.
Elementor Templates Import
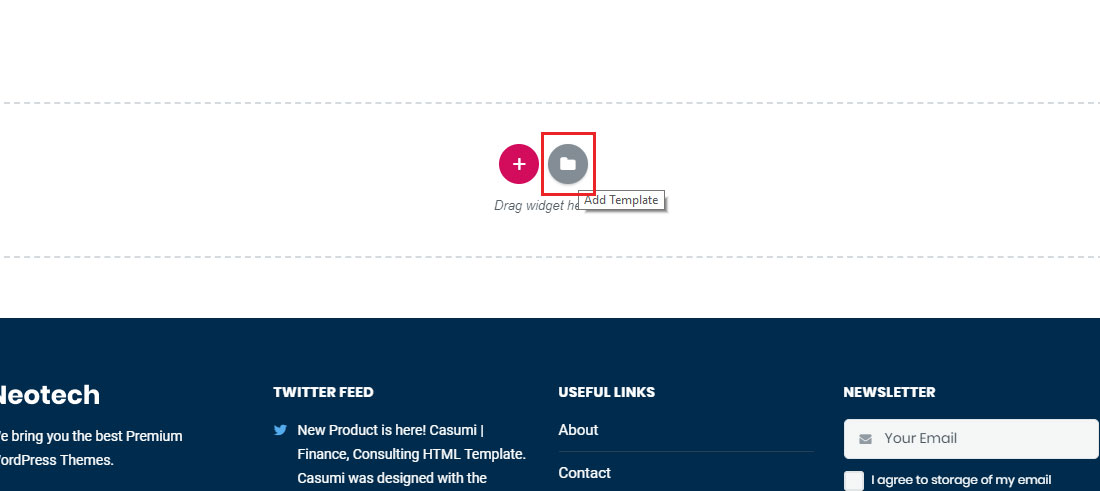
If you don't want to import all demo content you can just import single template.
1. Edit your page with Elementor and click Add Template
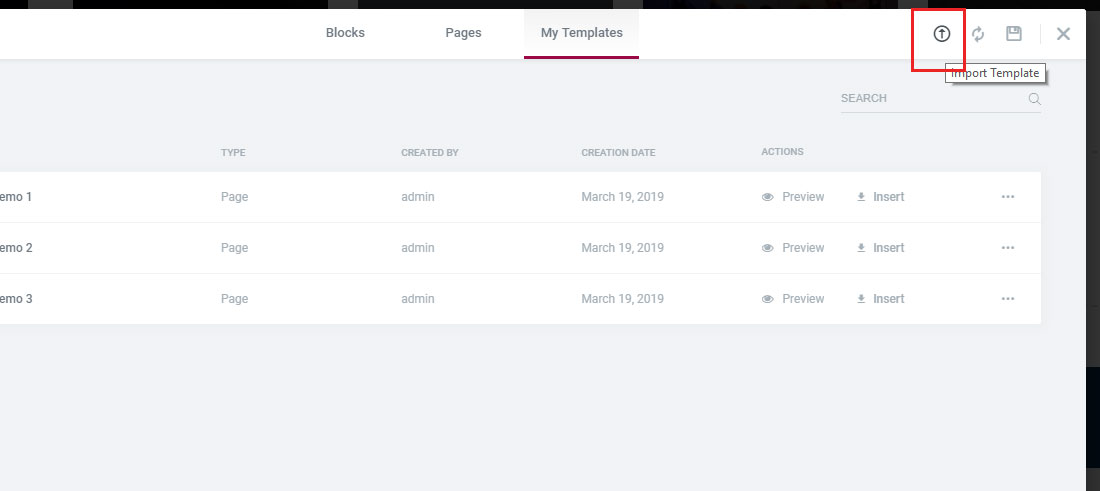
2. Click Import template and select template located in donwloadable theme archive
Child Theme
We recommend you to use child theme. You can customize it how you want, add css styles, functions etc. This way, when you get theme update, all your changes will be in place in child theme. Simply install and activate it after main theme.
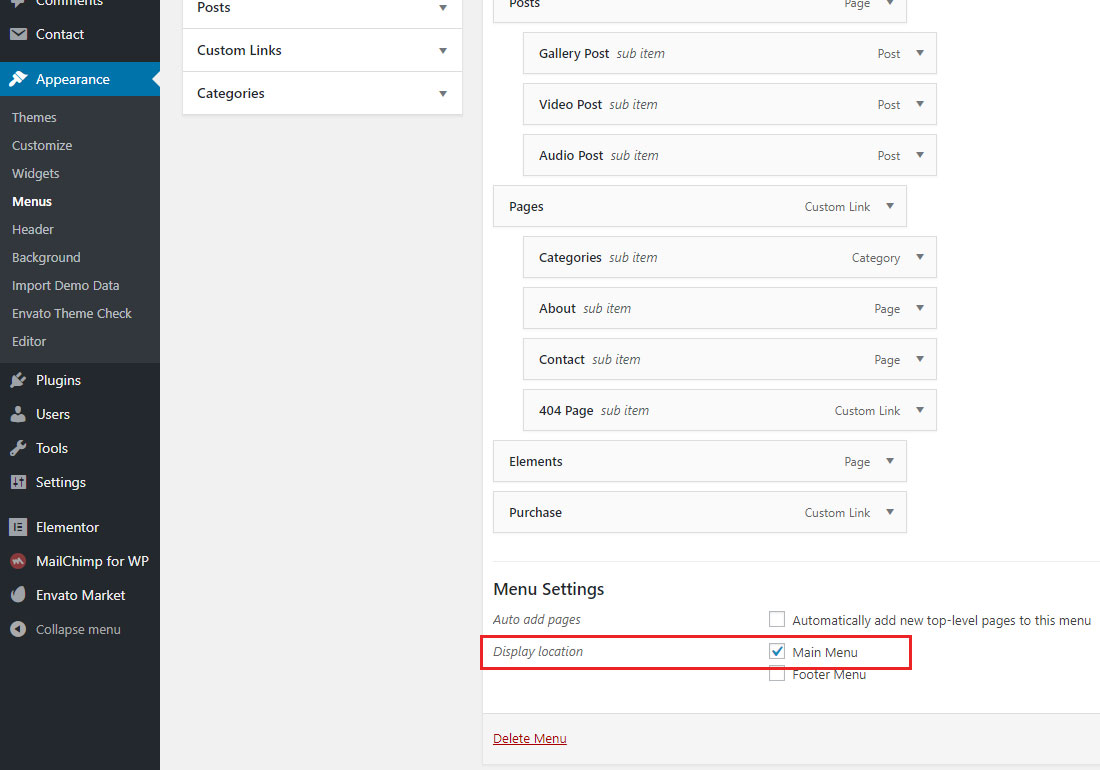
Theme Menu
Go to Appearance -> Menus. Make sure that Main Menu and Display location are set to Main Menu
Getting Started with Elementor
If you've never worked with Elementor page builder before, it's super easy to start. First you can check official videos on their YouTube channel. Additionally they have awesome Facebook community
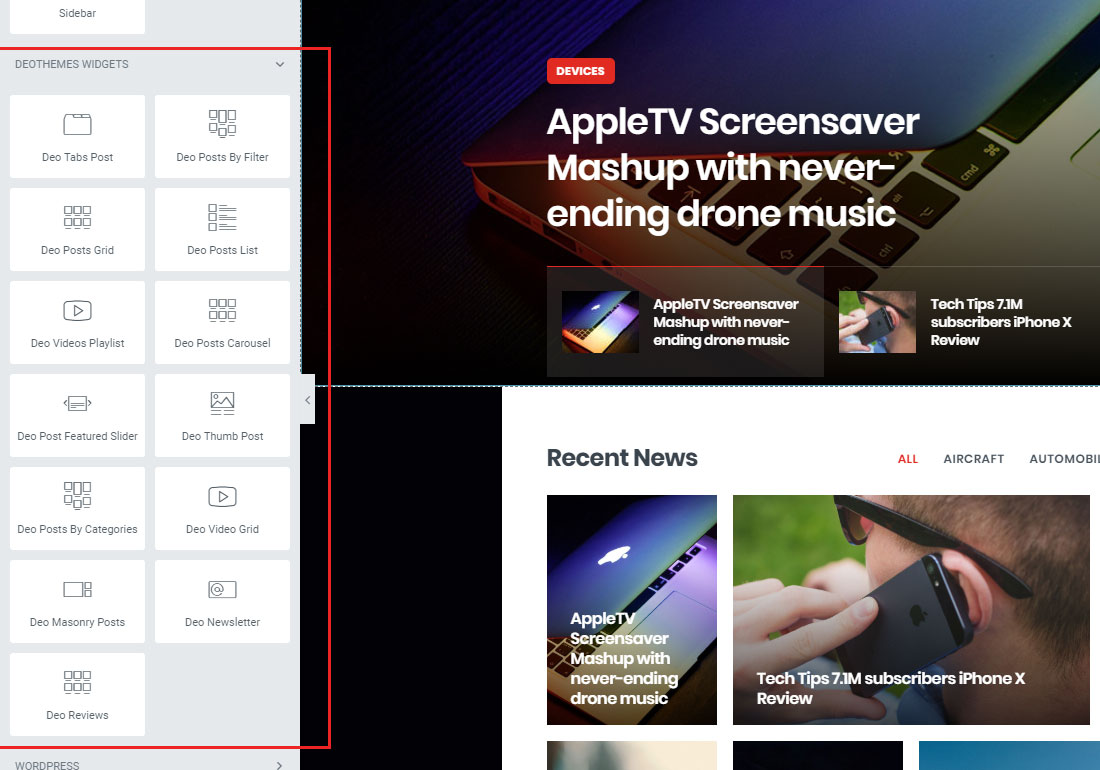
Elementor Custom Widgets
We've created custom widgets for Elementor. You'll find them under the general widget section. To get started simply Drag n Drop them into a page layout.
Theme Logo
You can upload your logo using customizer. Retina version should be twice bigger the original.
Image Resolutions
Minimum recommended image resolution is 1440x813. Select images that match the minimum width and height to avoid whitespace, bad alignment and other image related problems.
Regenerating Thumbnails
If you install Cripton on the existing blog with existing images we strictly recommend that you should regenerate your images. Please install and run Regenerate Thumbnail plugin
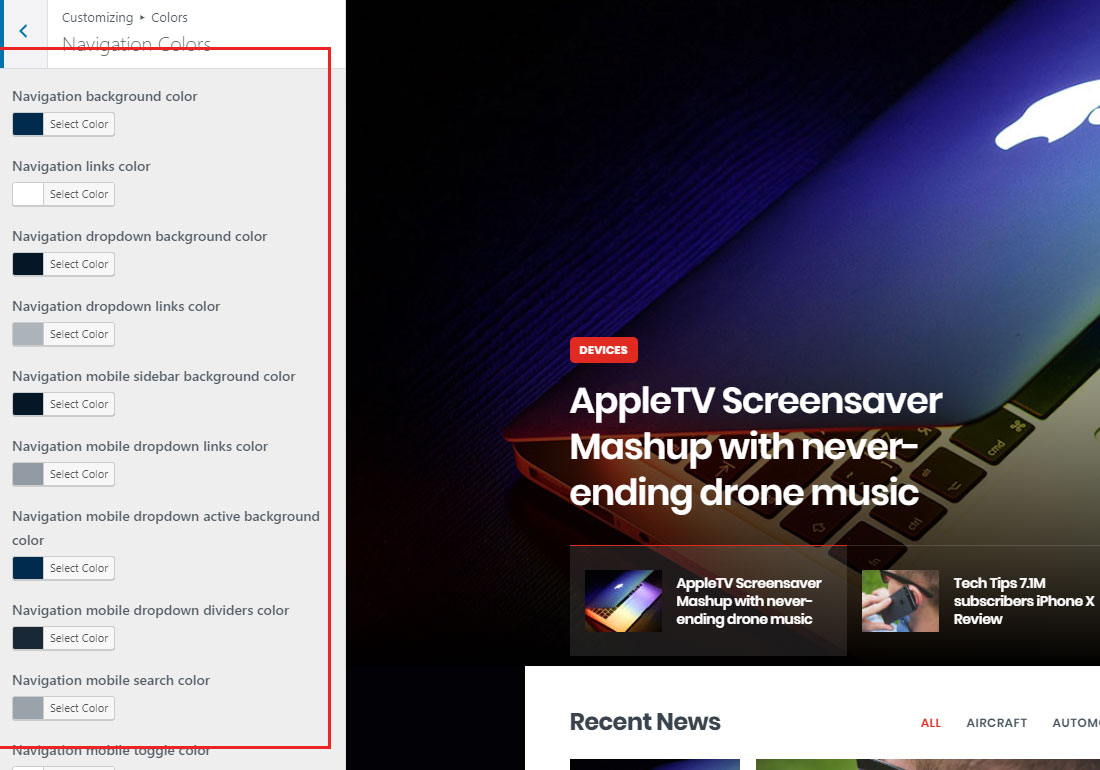
Colors
You can change theme colors using customizer. This will affect all elements except Elementor buttons. With Elementor you have control of every individual button.
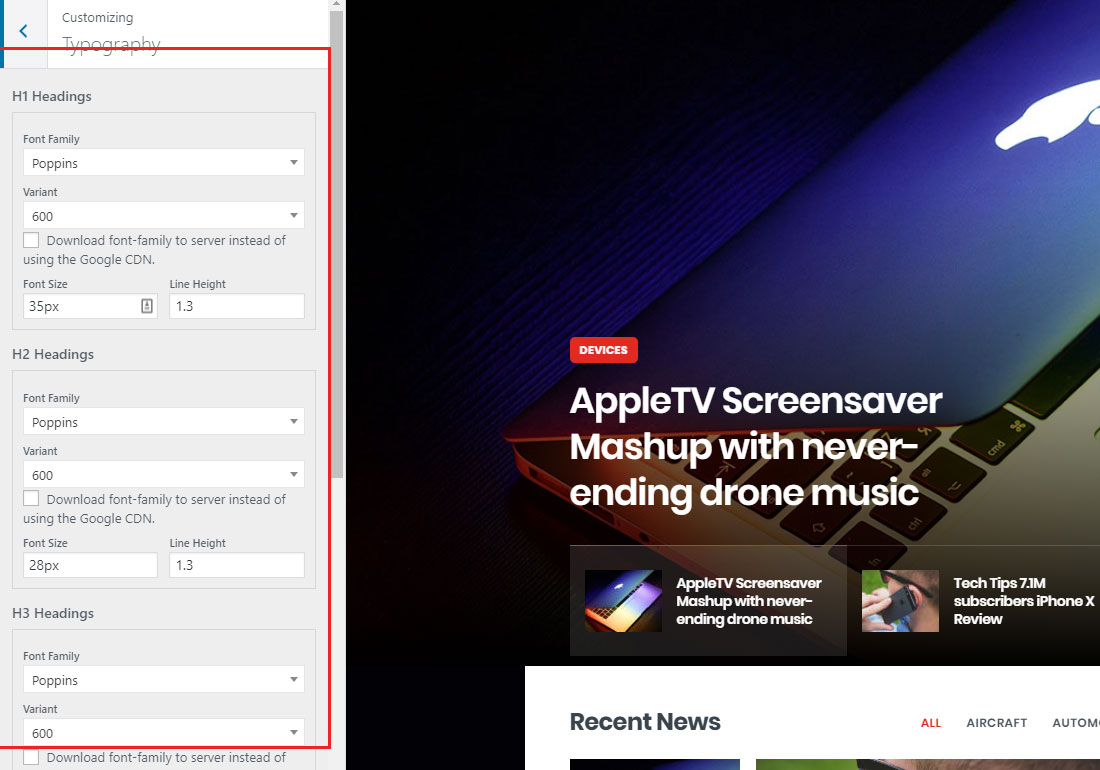
Typography
You can change theme typography using customizer.
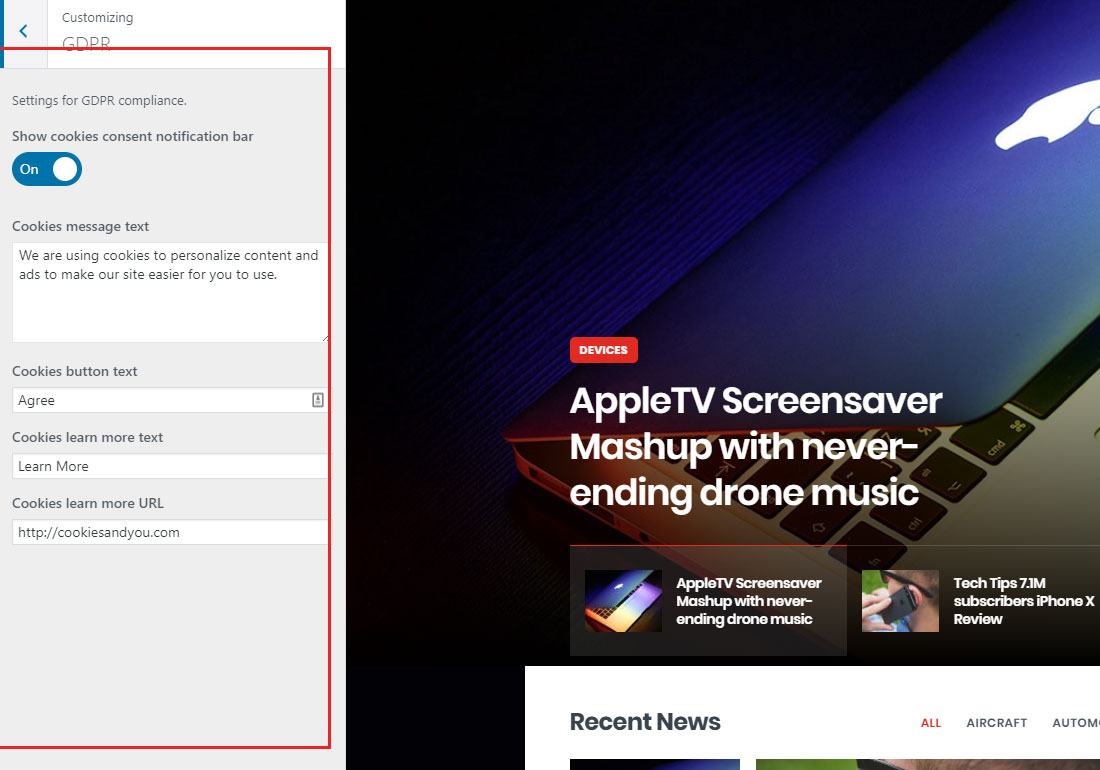
GDPR
To activate cookies notification bar, go to Appearance -> Customize -> GDPR. Edit message and link url as you wish.
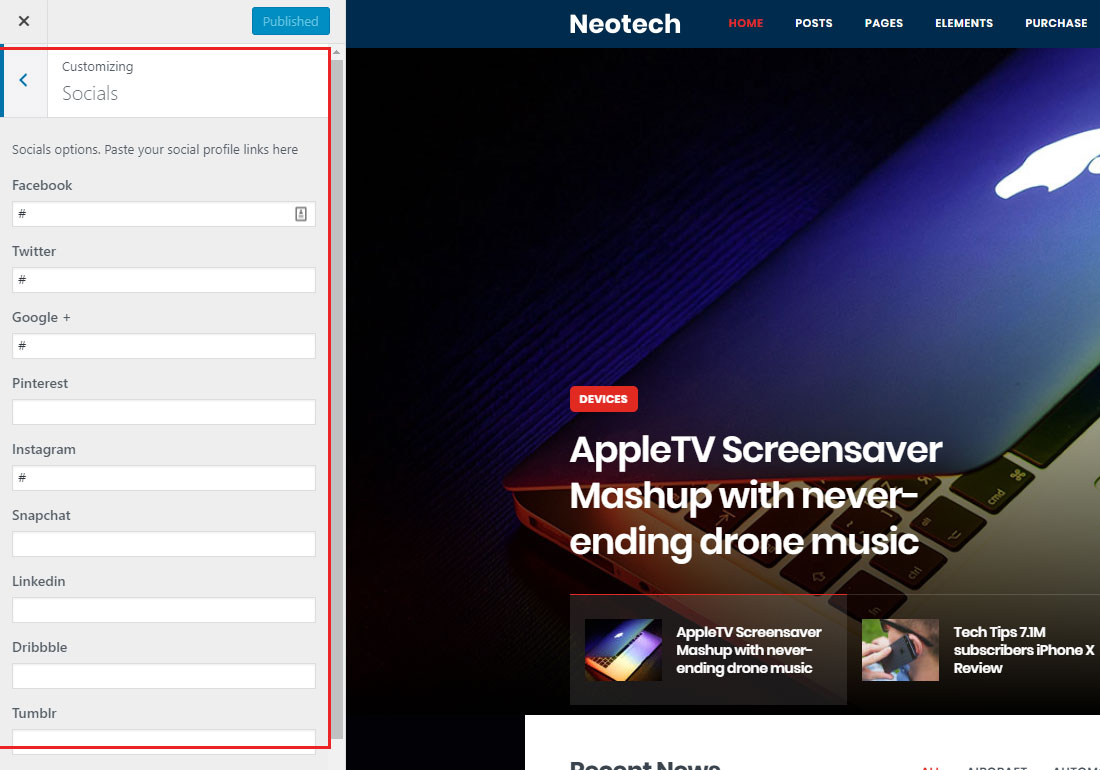
Social Profiles
Add you social profiles links or completely remove links from inputs if you don't want to use any social profiles. This option will effect Footer custom logo widget.
How to add custom icons using filter
Here is the example of how to add custom SVG icon using filter.
You may need to add custom CSS after that to style your new icon.
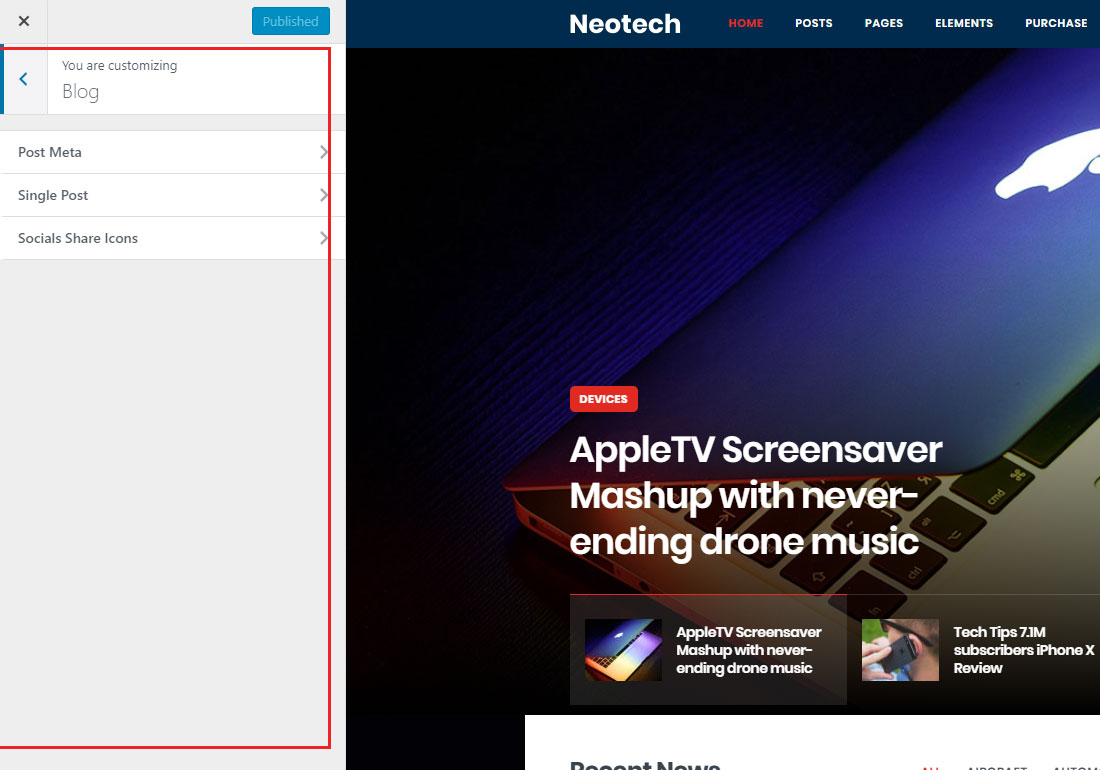
Blog Options
Blog options located in Appearance -> Customize -> Blog
This will affect default WordPress posts.
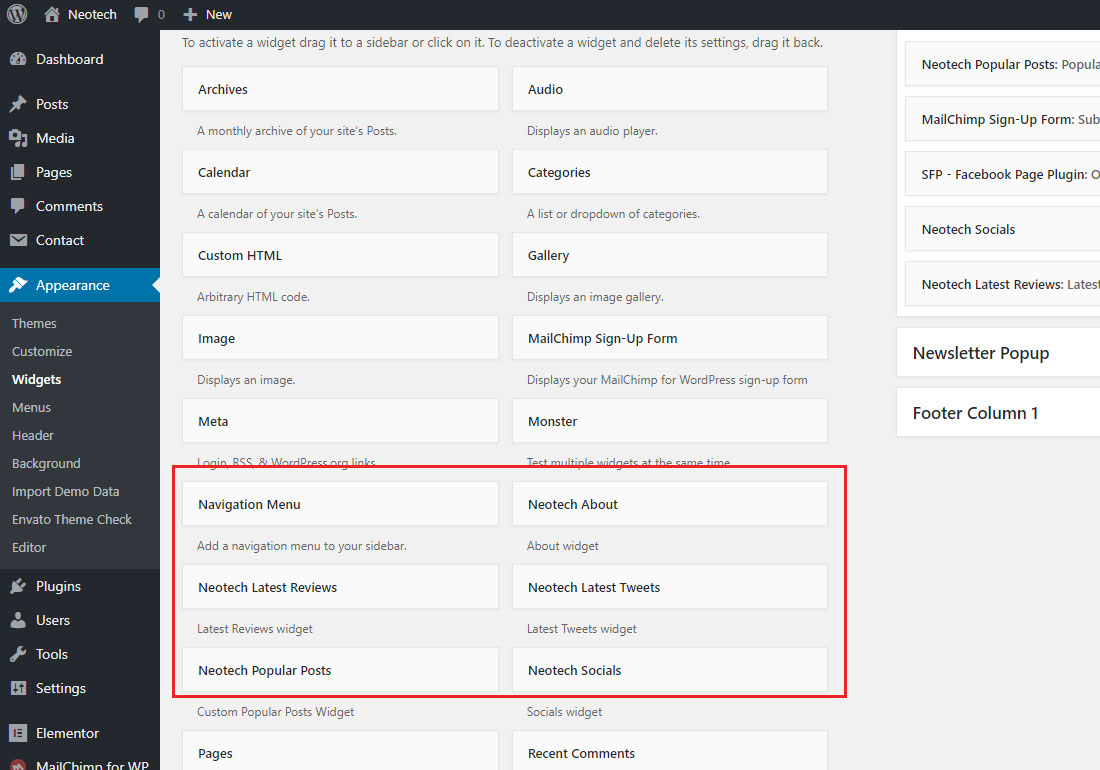
Widgets
To edit widgets go to Appearance -> Widgets. Drag & Drop the widget to the sidebar or footer, edit the settings for widgets.
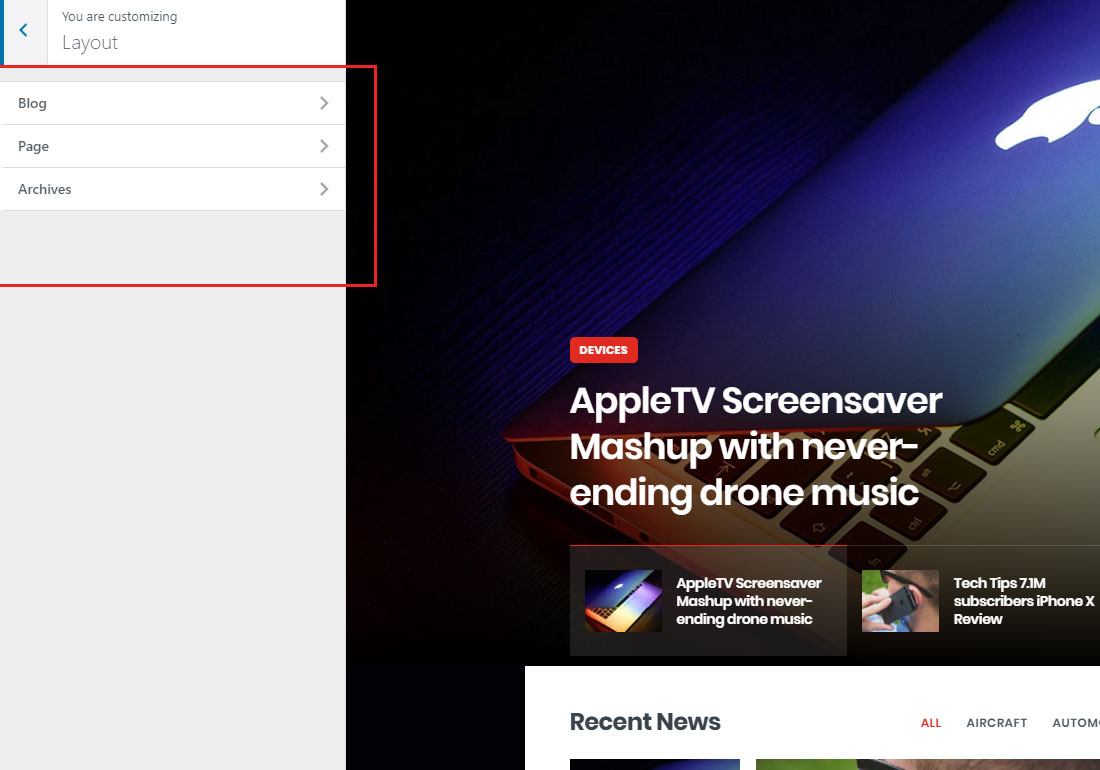
Layout
Page layout can be set individualy for blog, archives and regular pages. Got to Appearance -> Customize -> Layout. This will affect only regular pages. To change homepage sidebar use Elementor Drag & Drop Feature
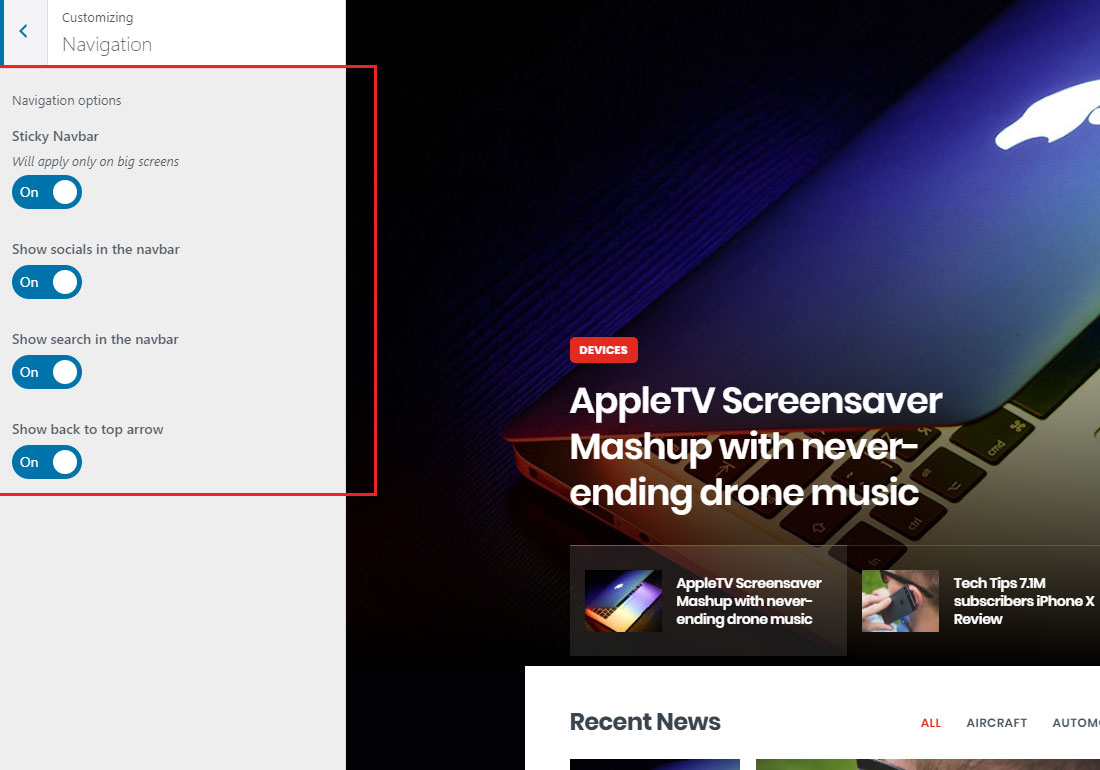
Navigation
Navigation options are located in Appearance -> Customize -> Navigation.
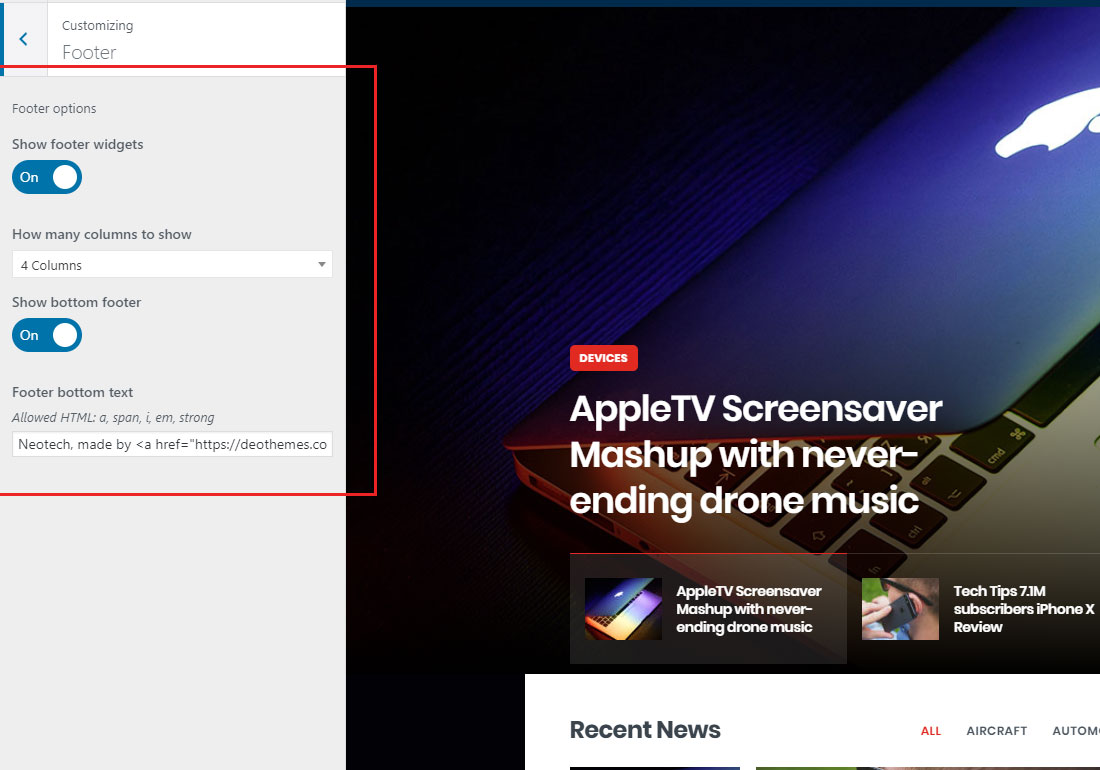
Footer
Choose how many widgets you need to show in footer. You can disable it as well. Edit copyright text.
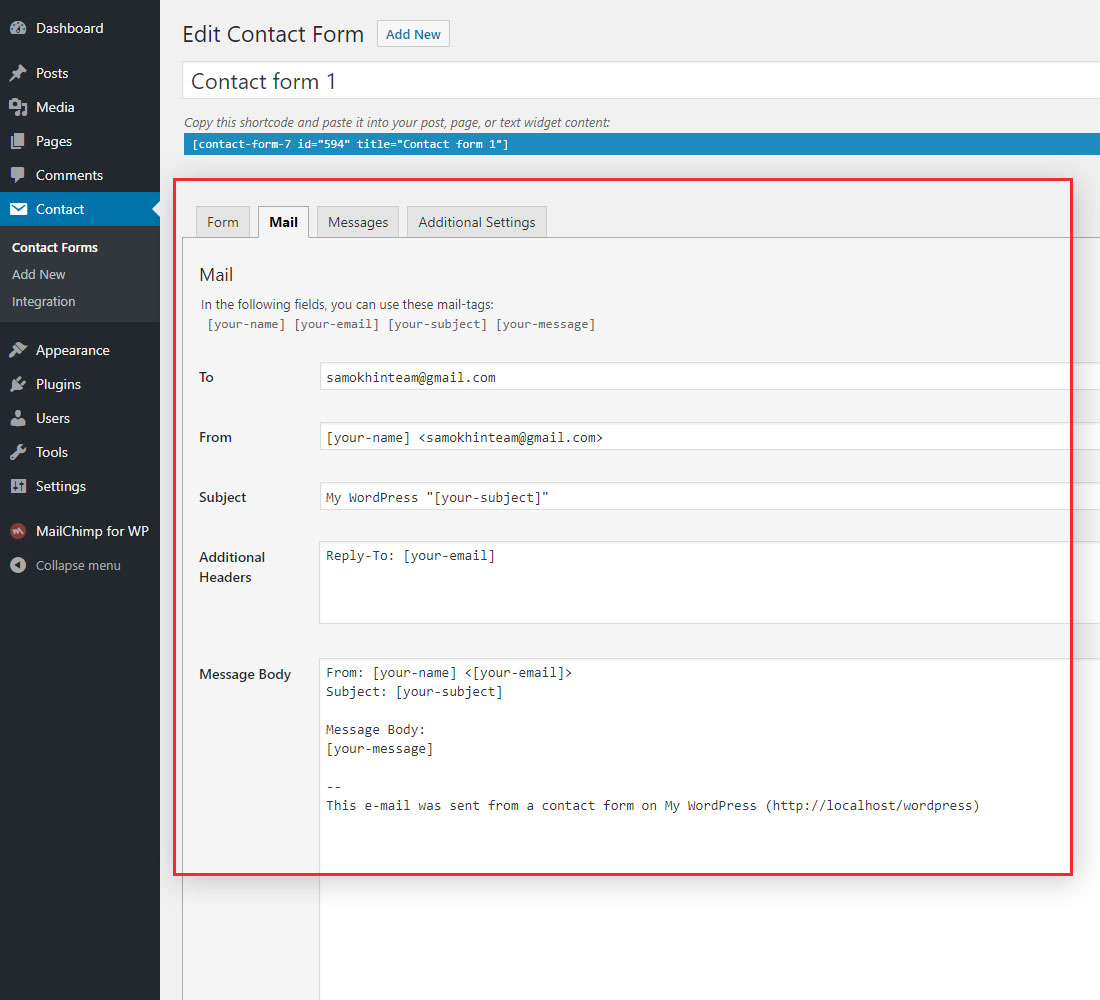
Contact Form
First, make sure that you have installed Contact Form 7 plugin. After this go to Contact -> Contact Forms and select Contact form 1. Here is the code reference for the contact form
Edit Contact form settings.
Make sure that you setup correct email address. Prepare a real “WordPress” email address. It is recommended you prepare a real wordpress@{your-site-domain} address on your host. Because the default mail template of Contact Form 7 (v4.0 and later) uses this address in its From field, someone might try to send mail to this address. Some hosts also block outgoing mail from this address if it doesn’t exist. Read more here
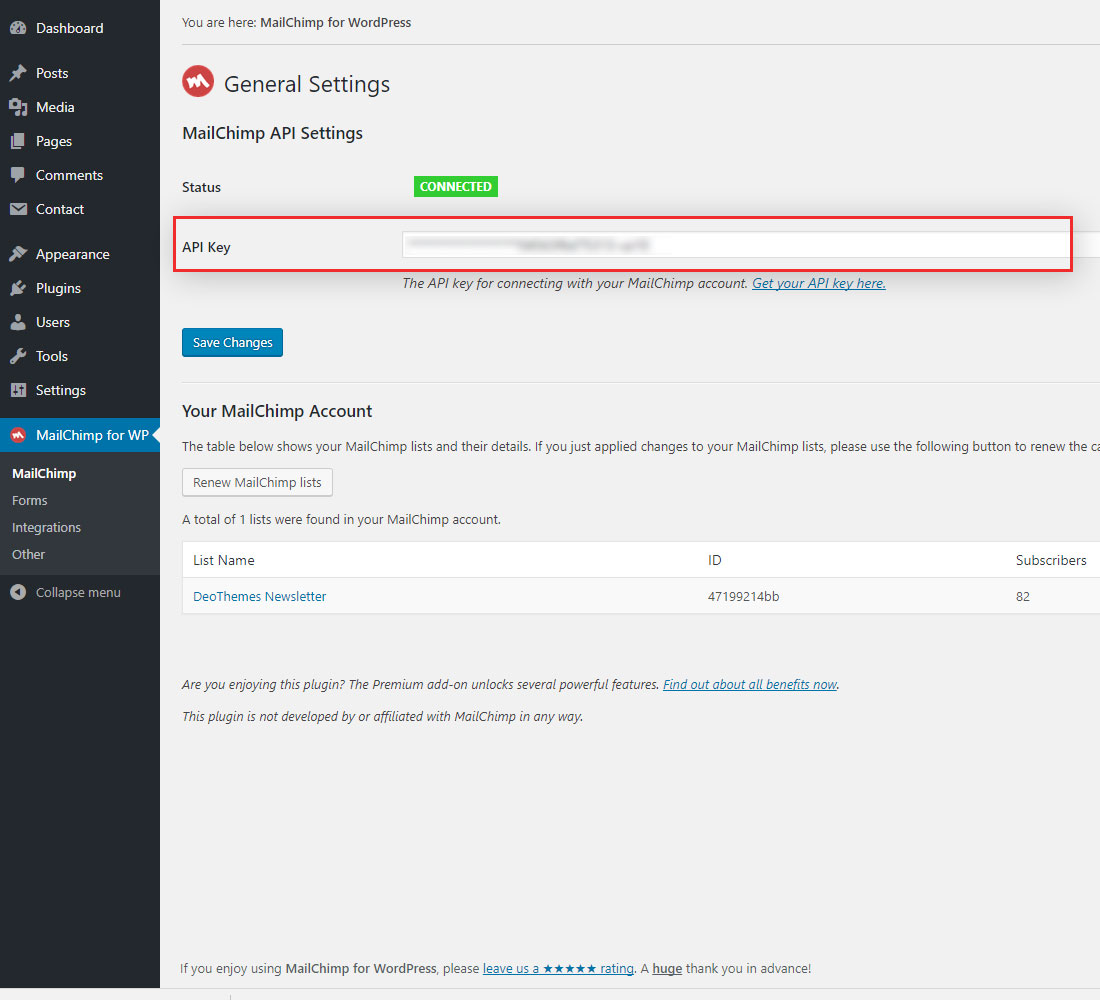
Mailchimp newsletter
First, make sure that you have installed MailChimp for WordPress plugin. After this go to MailChimp for WP and enter your API key from MailChimp, click on the Get Your API key link if you need to create new API key.
Theme Translation
To translate the theme you can use translation software such as PoEdit or Easy Po.
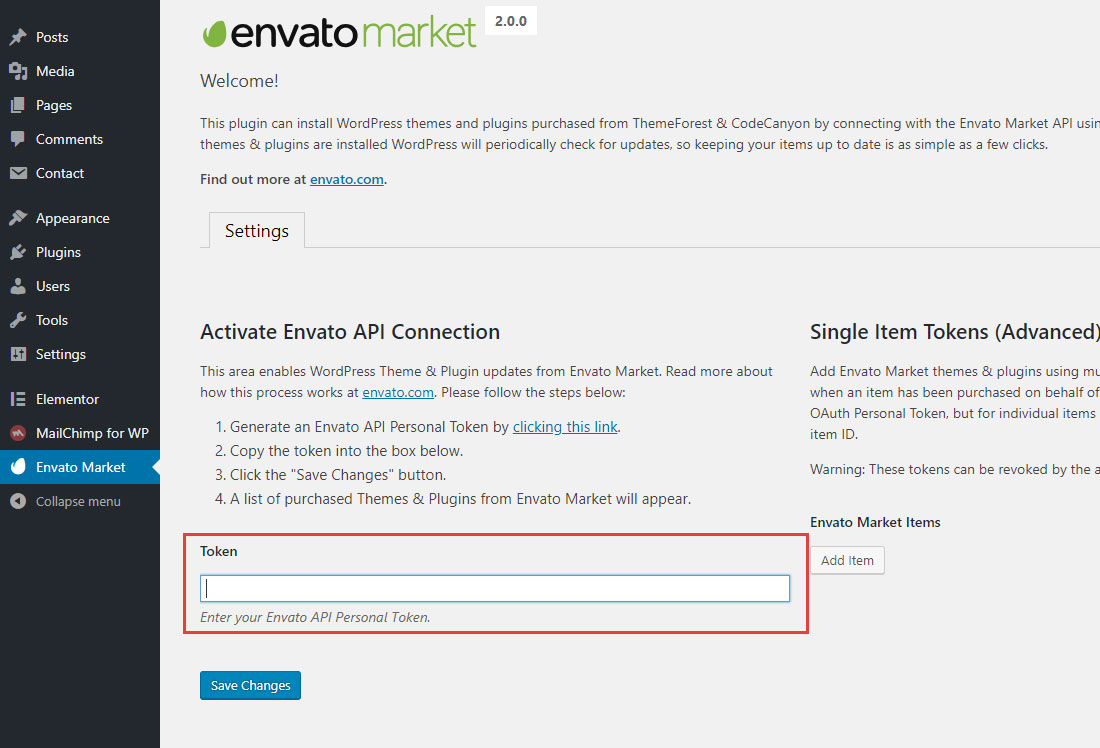
Theme Update
There are 2 options of how to update your theme.
Option 1 (automatic):
Install recommended Envato Market plugin. Generate an Envato API Personal Token, paste the token and save changes. When the theme has new update, you will see the notification and can update it on the fly. Read more about how this process works at envato.com
Option 2 (manual):
Activate other WordPress theme (ex.: Twenty Seventeen). Delete current theme. Upload new version of current theme.
Here is the short video of how to do it.
Credits
Support
If you have any question feel free to visit our Support Forum